Do you use Pinterest to grow your blog?
If not, you’re seriously missing out.
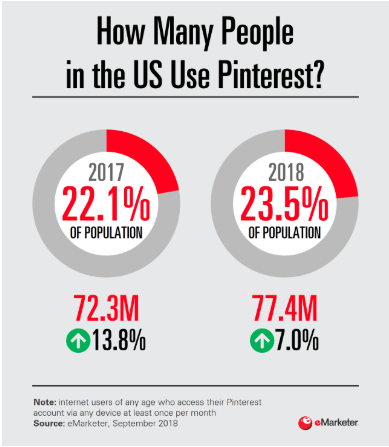
Pinterest’s userbase is growing consistently year over year which means that there are more people than ever to reach.
Yet so many bloggers don’t take advantage of these networks!
They’re practically shooting themselves in the foot.
It’s a completely free platform that you can use to drive insane amounts of traffic.
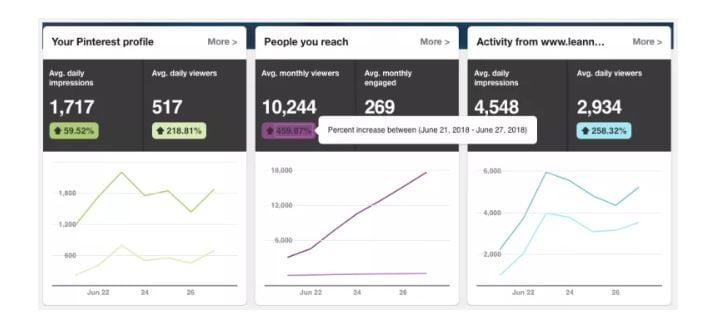
In fact, look at Leanne Wong. She used Pinterest alone to grow her blog traffic by 459%!
Don’t you want results like that?
If so, keep reading because ahead I’m going to teach you how to use Pinterest for exploding your blog.
How Pinterest and blogging go together like peanut butter and jelly
Pinterest is a visual based social media platform where users upload infographics that are fun, interesting, and sum up information.
The main demographic using the website are educated 18-29 year old women from suburban areas earning $75,000 or more in income.
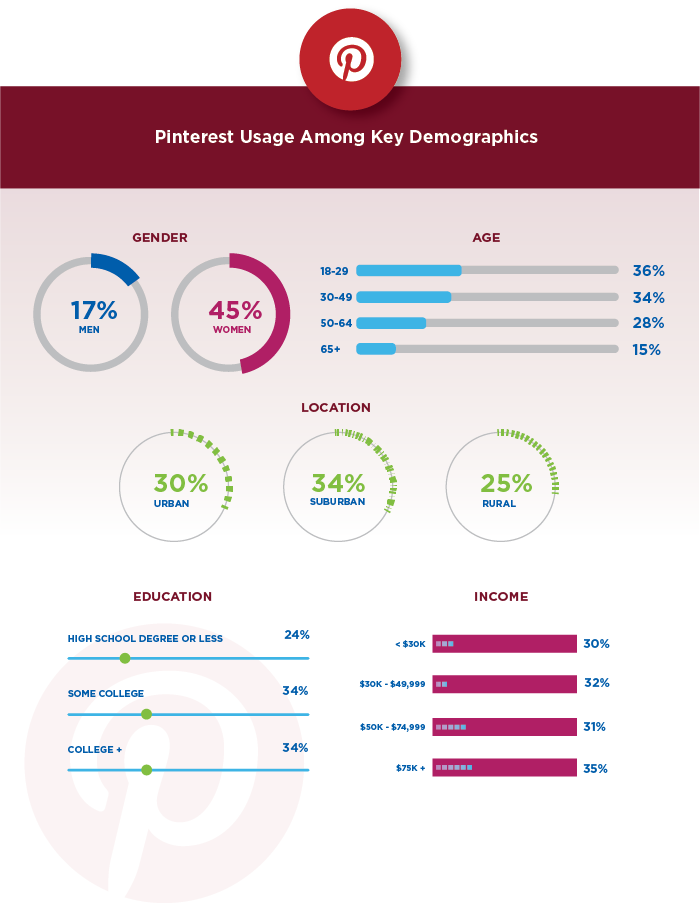
If this aligns with your target audience, you’ll experience even better performance.
Furthermore, most people use it for learning things like recipes, skills, and strategies.
That means it doesn’t matter what niche you’re in. You could blog about dogs, digital marketing, or cooking exotic dishes. There’s a space for you on Pinterest.
And you don’t have to the Steve Jobs of graphic design, either. I’ll be showing you how to quickly and easily create graphics that will blow users minds and get them clicking to your blog.
These graphics are uploaded to Pinterest and can include a link back to the original blog post. This is what we call repurposing.
It’s one of the most effective strategies in blogging.
You take one piece of content and turn it into several others.
Users that enjoy the graphic and want to learn more will click the link and go back to your blog, earning you a new visitor 🙂
Now, let’s move onto how to actually achieve these results.
How to use Pinterest to grow a blog
Follow these steps and you will be able to turn Pinterest into a blog traffic machine.
Step 1: Set up a profile that represents your website nicely
Your profile is the first impression someone has of your brand. It needs to be professional or you’ll leave a sour taste in users mouths.
That’s why the first step is to visit Pinterest’s homepage and register via email, Facebook, or Google.
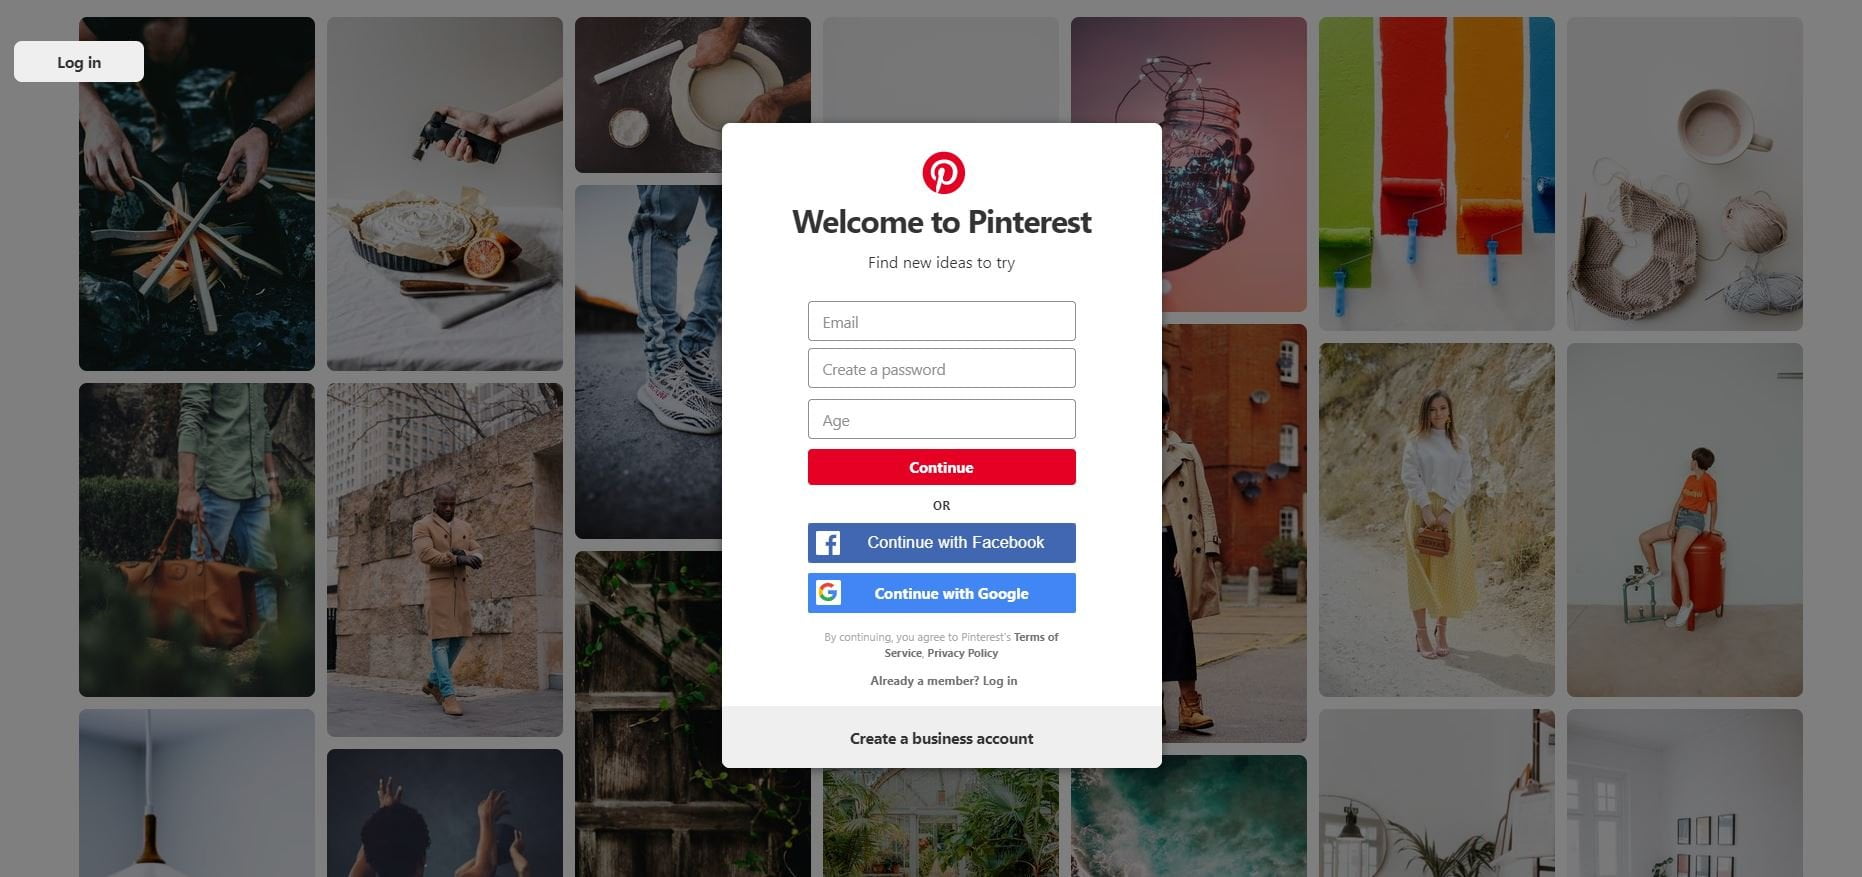
Click the three dots on the top right corner to begin editing your account via “Edit settings.”
Upload a high quality photo of yourself or a logo depending on the brand of your blog.
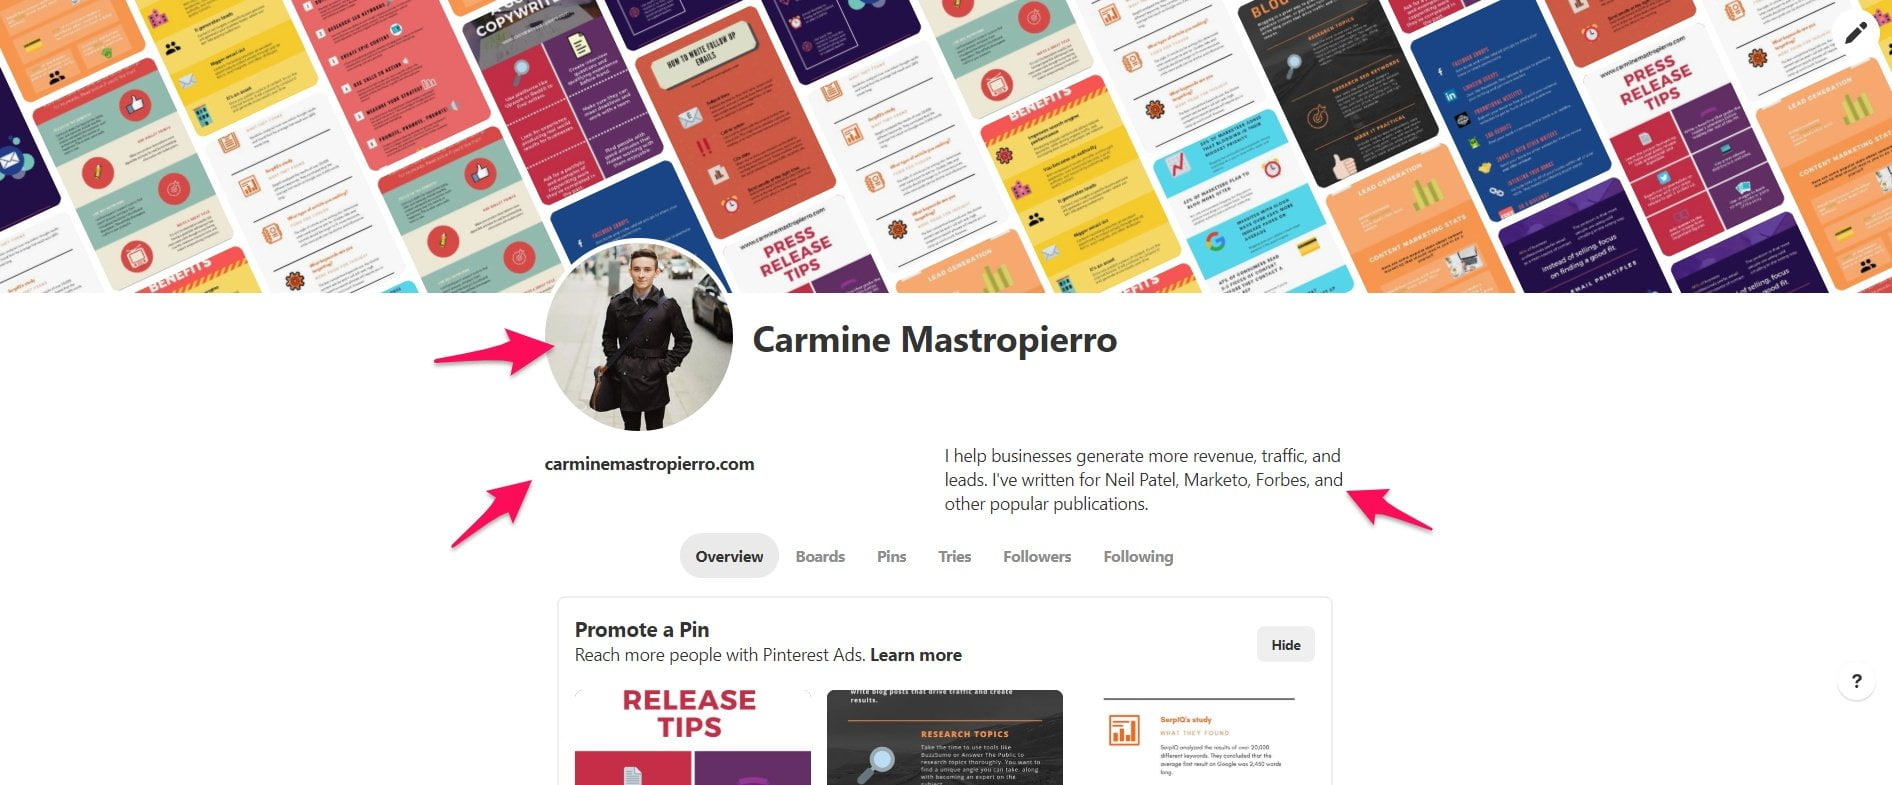
Ensure that you also include a link to your website from the settings.
The biography section is where you can describe your blog, services, or products. Feel free to make it fun, quirky, or namedrop to impress people.
As you begin uploading graphics and creating boards, Pinterest will automatically create a collage of them as your cover photo.
Alternatively you can click the pencil button to change what boards are featured.
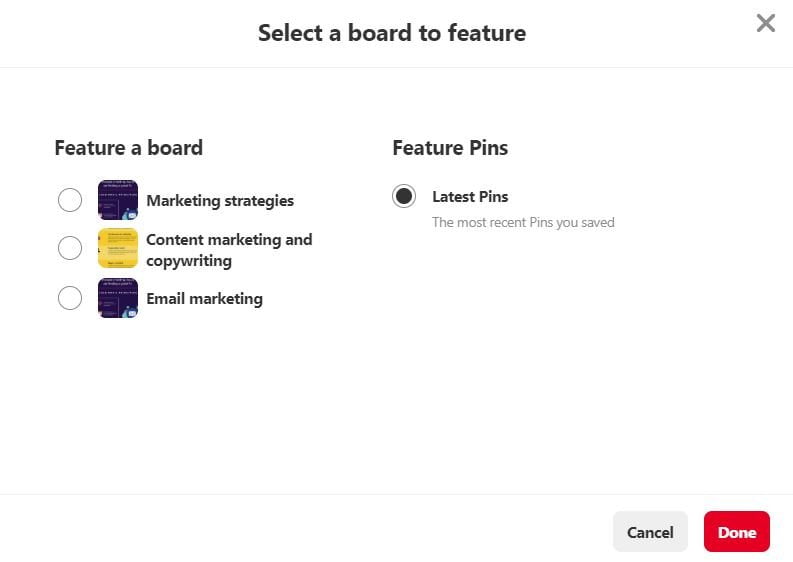
Once you’ve set up your account, move onto the next step.
Step 2: Create boards for every topic you write about
Boards are sections you upload pins to.
You should create a board for all of the different topics you write about on your blog to organize them.
Create your first board by navigating to the “Boards” section of your account and clicking the plus button over the “Create board” option.
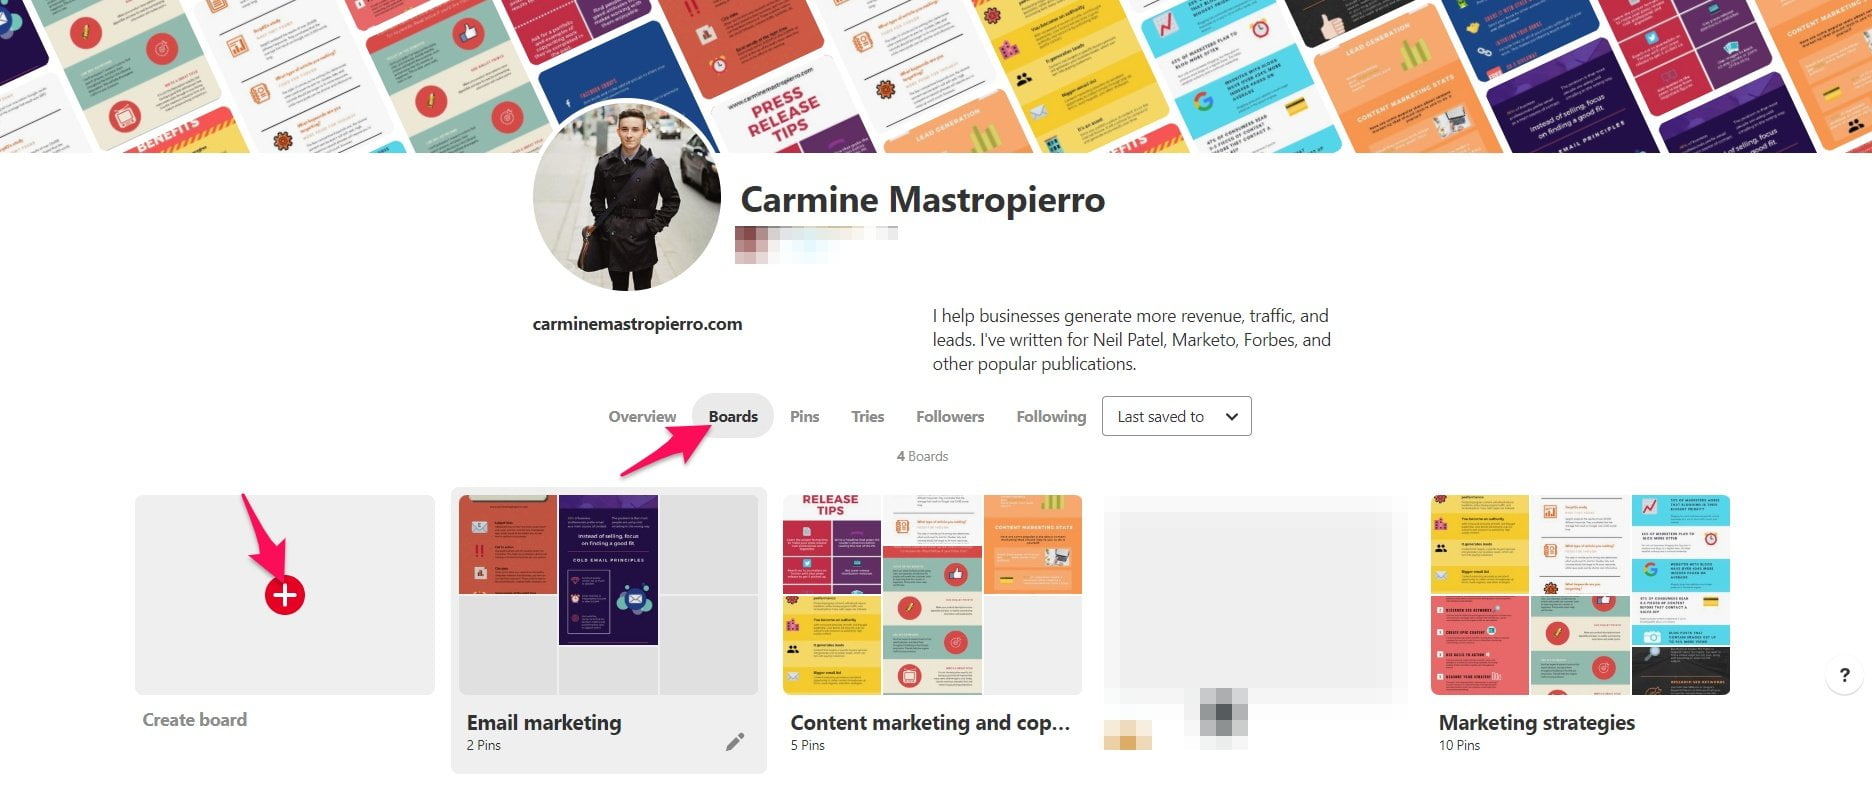
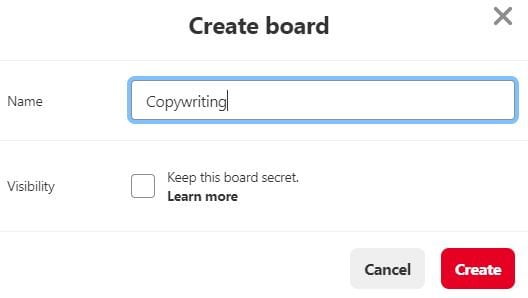
Give it a name and you will be forwarded to your brand new board!
You’ll notice that it’s quite empty, though.
That’s because you need to start filling it up with awesome content!
Step 3: Upload amazing infographics that sum up your blog posts
With your Pinterest account set up, it’s now time to start uploading graphics that people can’t wait to share.
The best part about this process is that you already have 90% of the work done.
Blog posts you’ve published simply have to be transformed into infographics that sum up the major points.
And don’t worry.
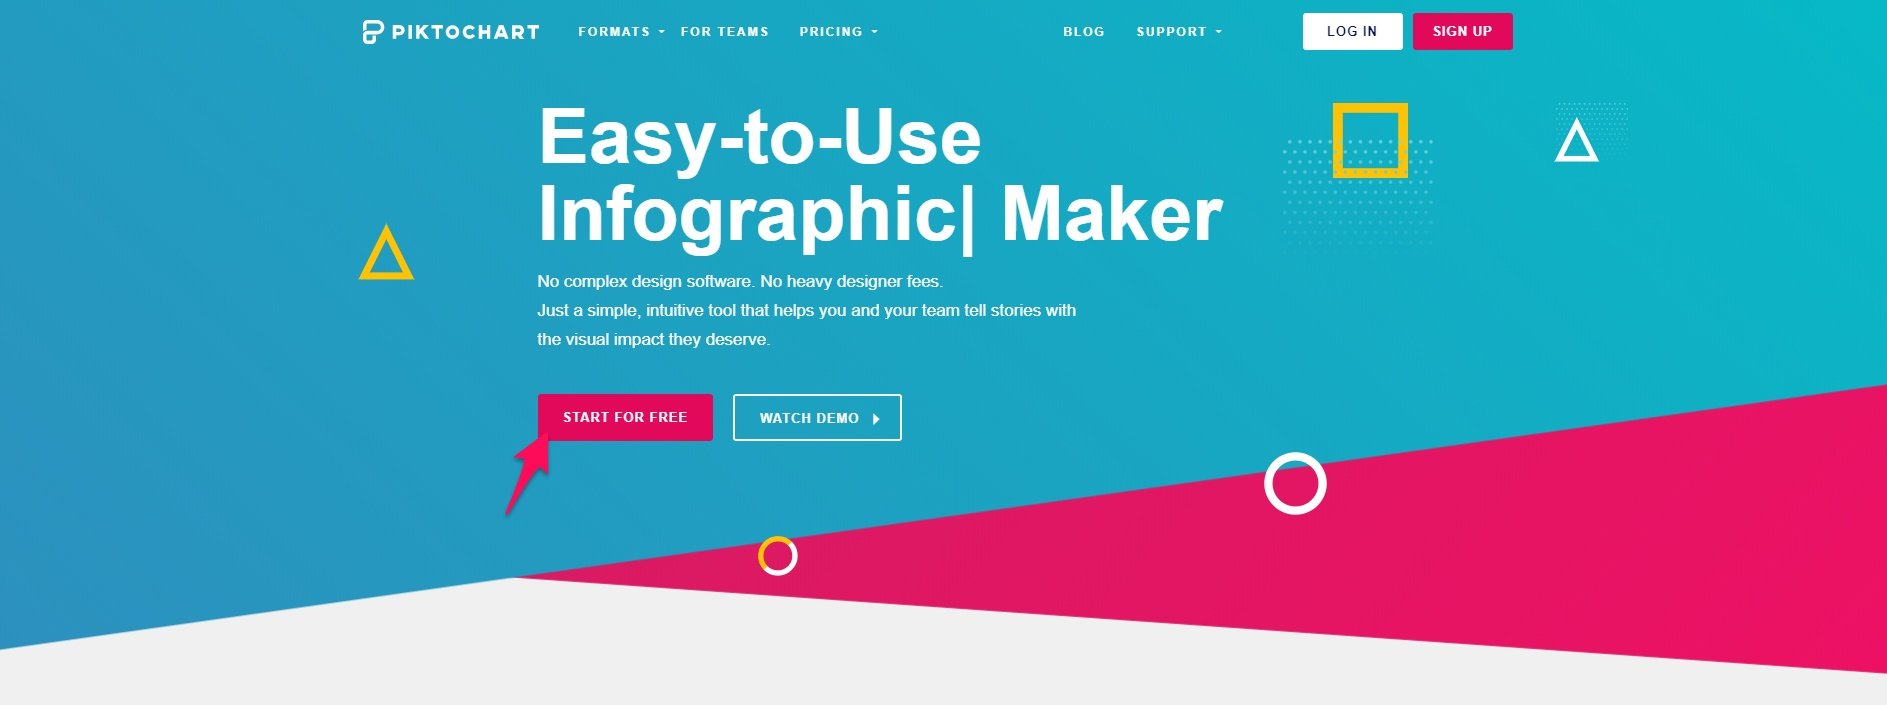
You don’t need to study graphics design at Harvard University to make cool images for Pinterest thanks to tools like Piktochart.
Begin by signing up for a free account from the homepage. You can register via Facebook, Google, or email.
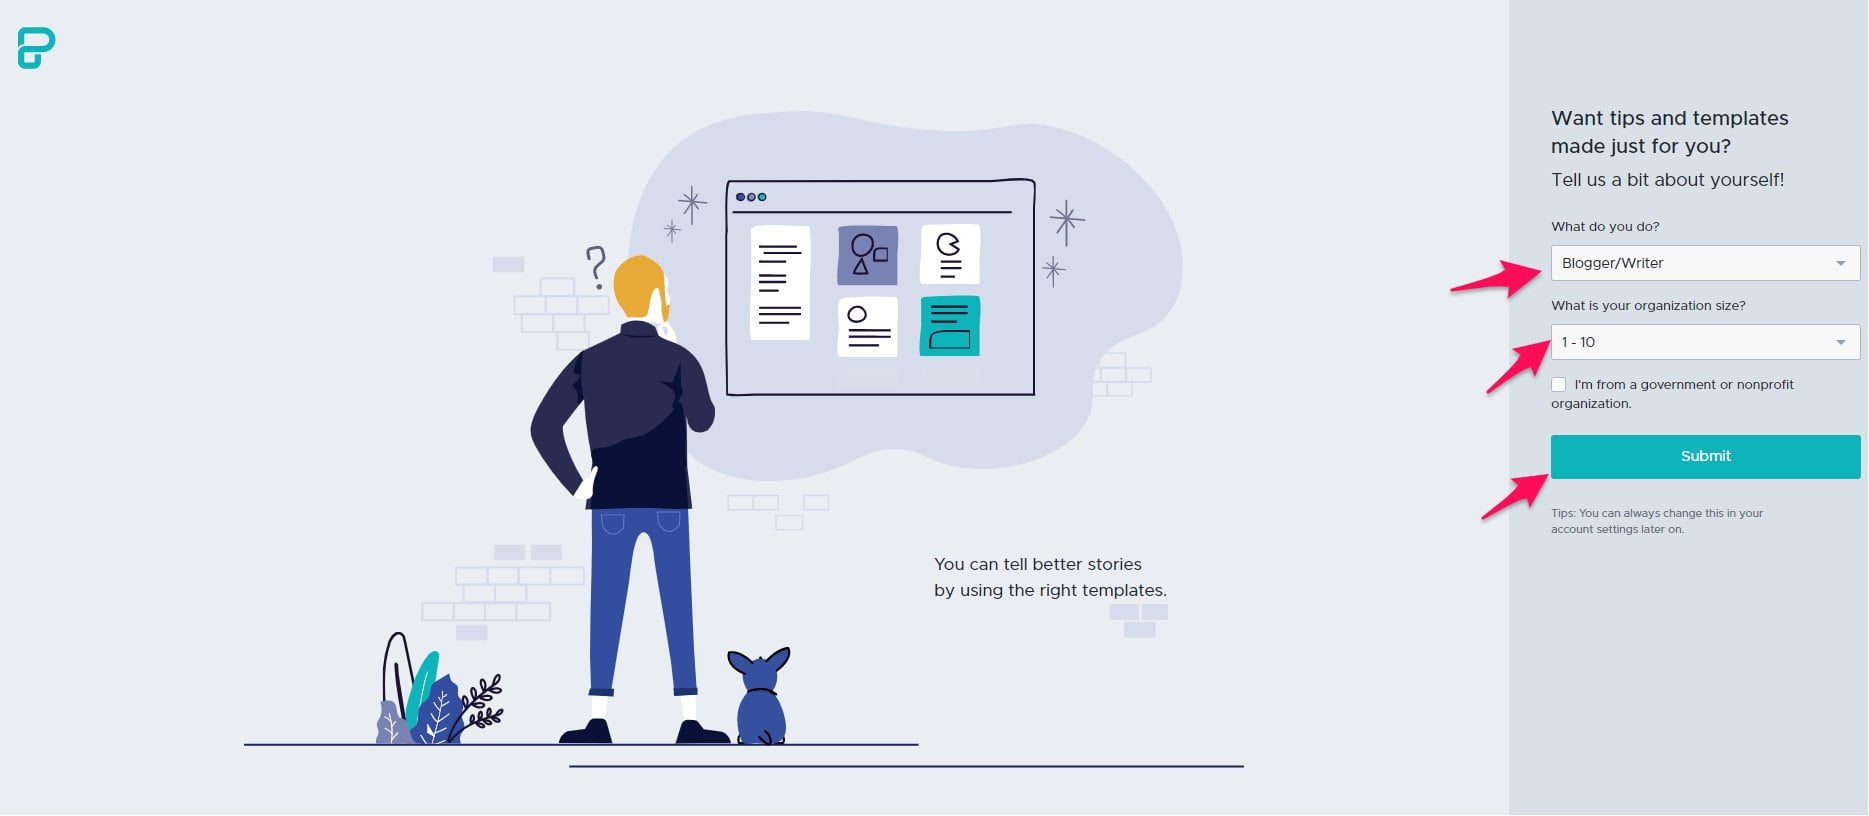
After this, they will ask you a couple of questions to optimize your account.
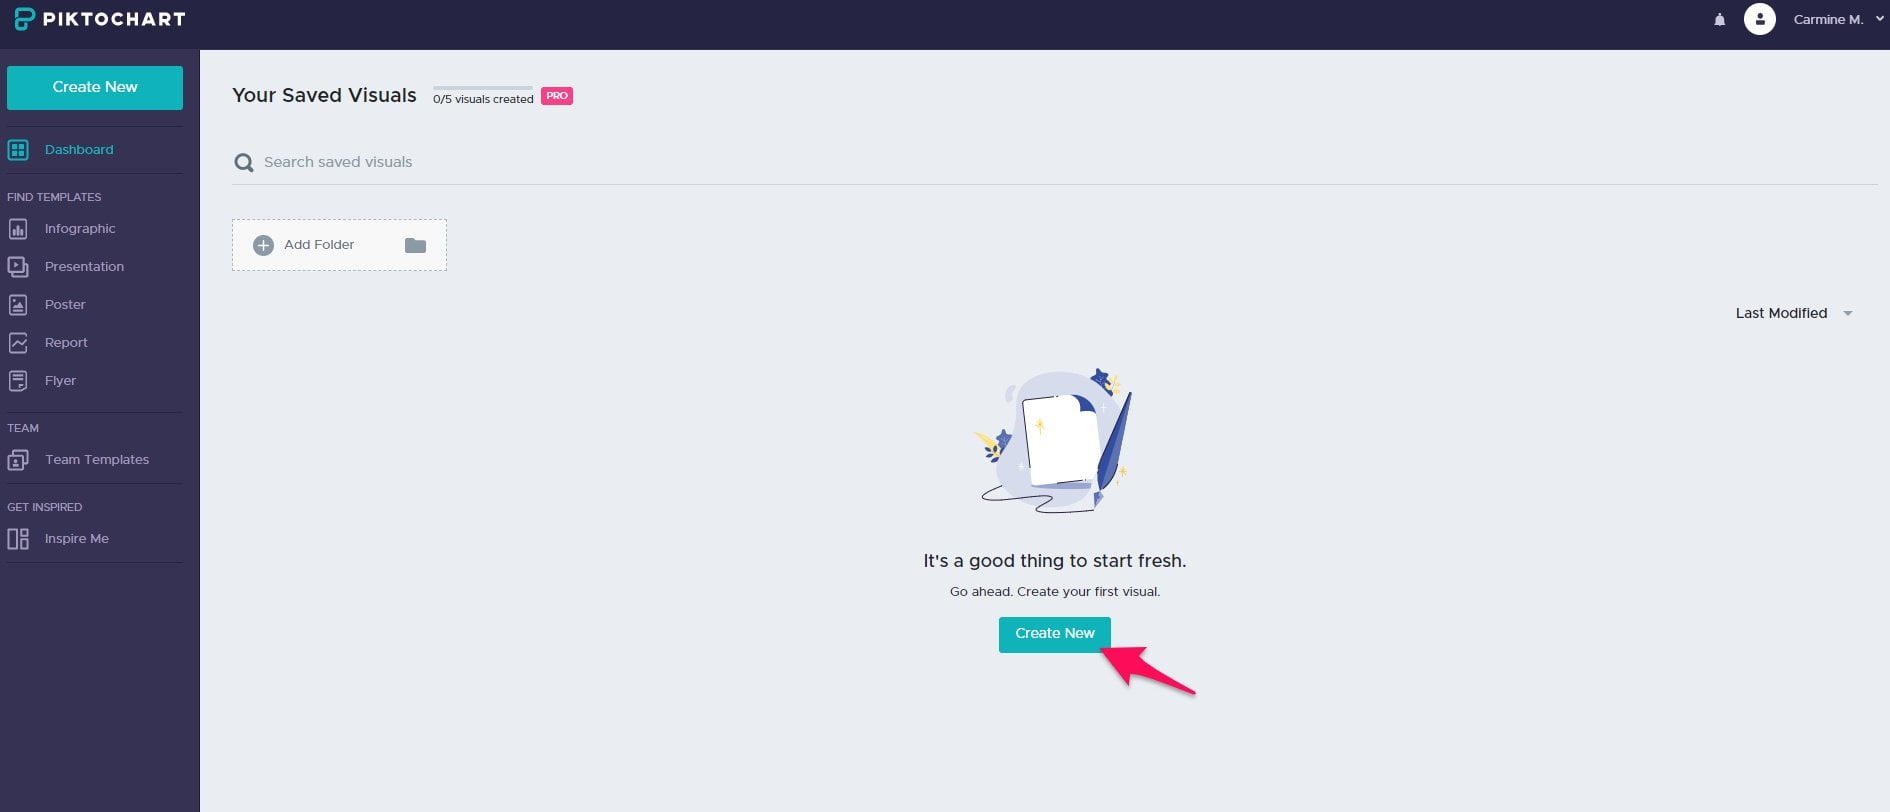
Click the “Create visual” button on the dashboard to begin making your first infographic.
Choose the infographic option from the next page along with a template.
You can then edit it with text, shapes, icons, and more.
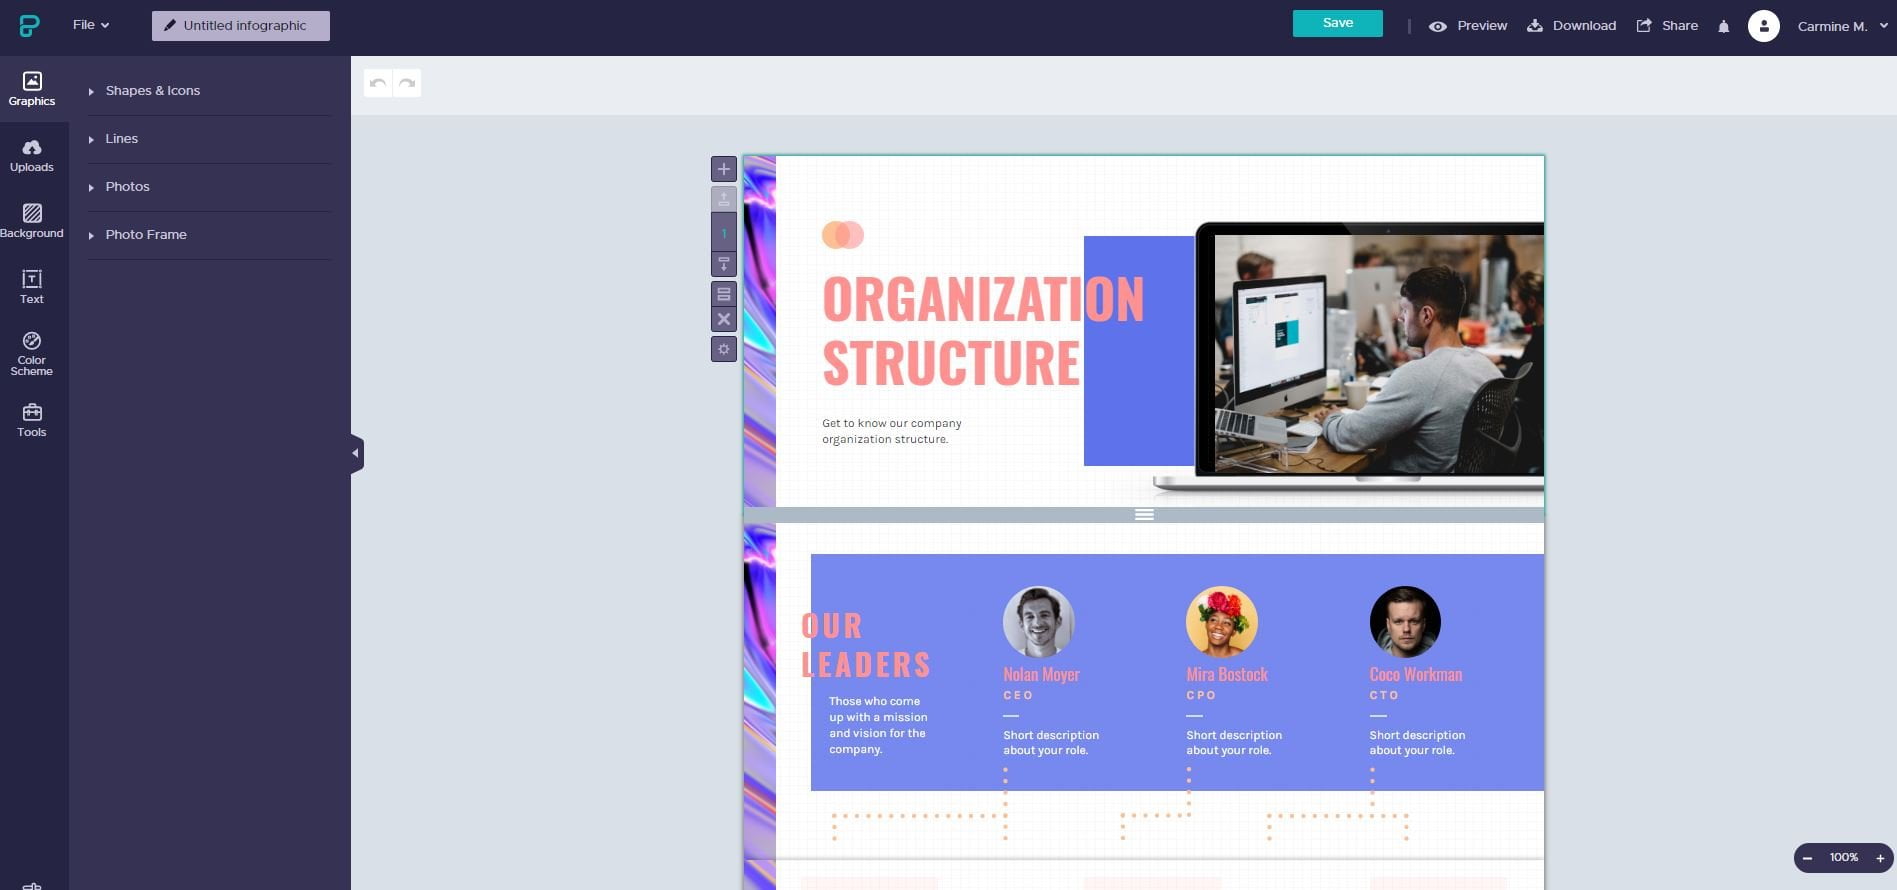
Pull up an article and simply paste over some of the major points you made.
Keep in mind that the goals of an infographic are to share:
- Practical and actionable steps or strategies.
- Entertaining pictures, icons, and shapes.
- Data and statistics.
Click the download button from the top navigation when you’re happy with your graphic.
Then, head back to Pinterest and click the red plus button on the top right and select “Create Pin.”
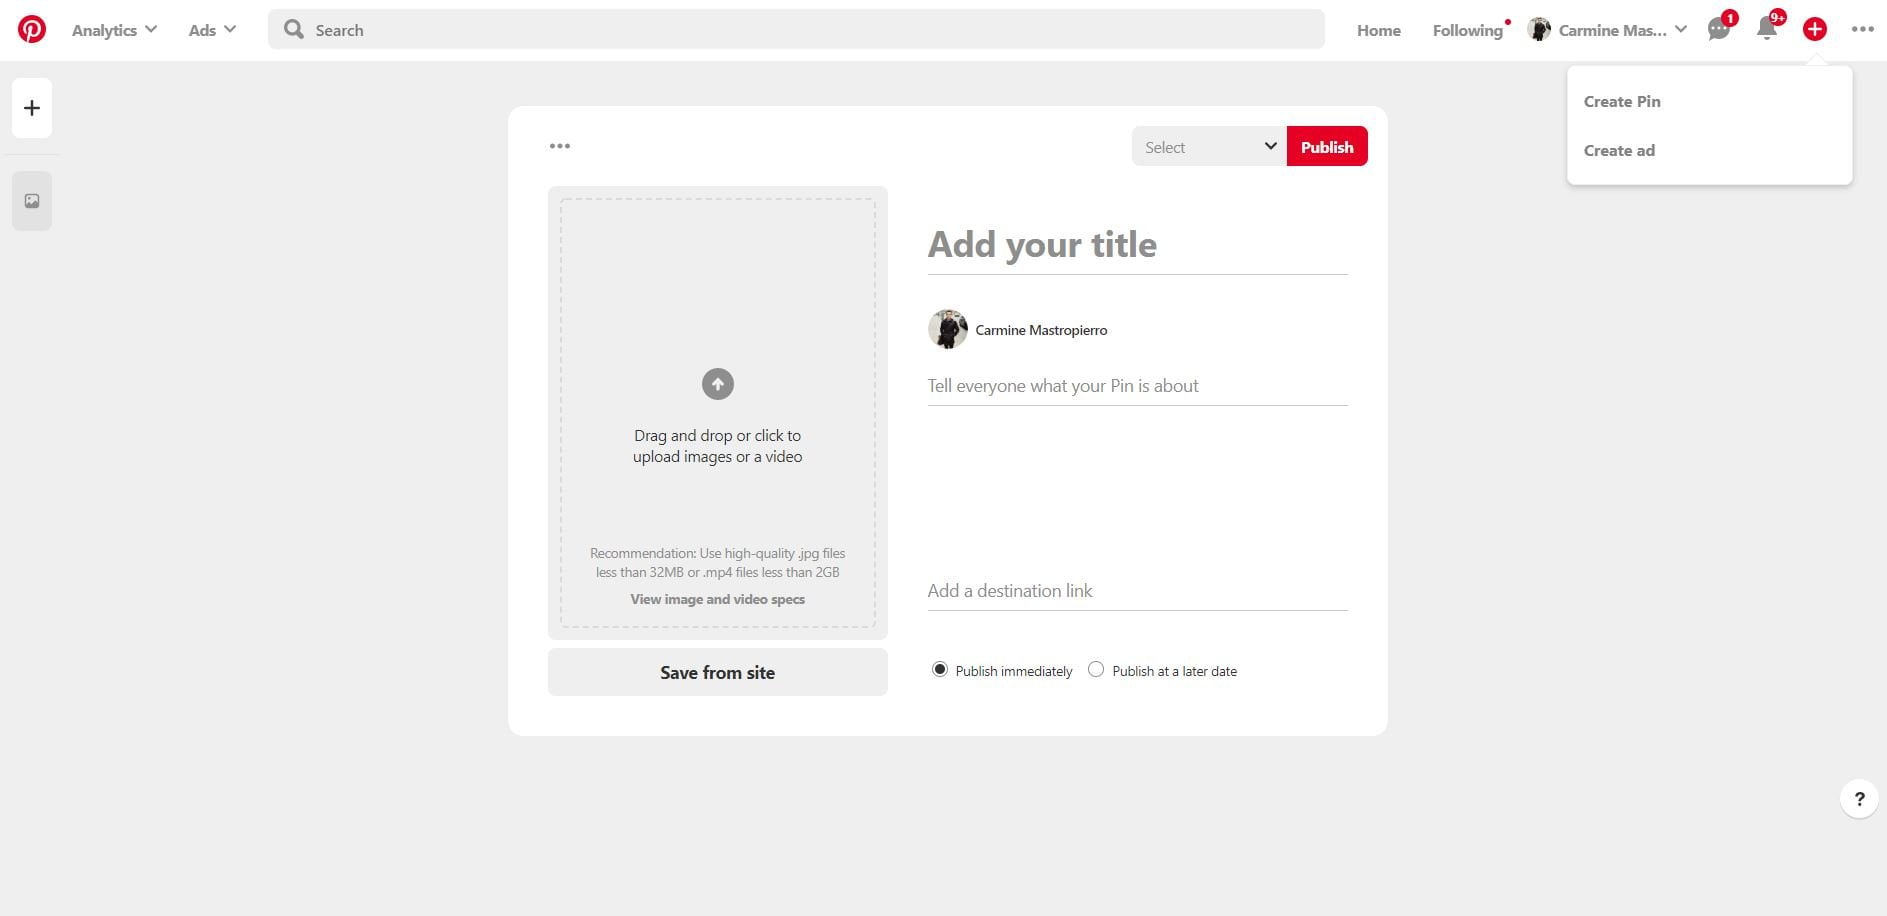
You can upload the infographic on the left.
Give it a descriptive title to help users find it naturally through Pinterest’s search engines.
The description should also be rich in keywords and information.
Copy and paste the URL of your blog post the image is based on in the “Add a destination link” field.
Lastly, the dropdown menu on the top is where you can select which board you’d like to post it to.
Congratulations, you’ve officially pinned your first image 🙂 Next let’s learn about building an initial following.
Step 4: Follow and engage with other users
Right now your Pinterest account is looking more barren than a desert.
Let’s change that.
Search for keywords in the search bar related to your blog’s niche.
Switch the dropdown option to “People” afterwards, as well. This will display all of the accounts that align with what you searched.

The goal is to follow as many people as possible and engage with them.
This will help you create micro relationships with other users and they will be likely to follow you back.
Remember… social media is used to be social.
If you want to go a step deeper, find a relevant account and go to their followers.
You can then begin following these users since they’re more likely to be your target audience.
This is because Pinterest will display larger accounts when searching for people.
Feel free to send other users direct messages complimenting them on their content and account, too.
It’s small things like this which will make you stand out from the crowd on social networks.
Step 5: Consider investing in Pinterest ads
So far I’ve been showing you how to organically use Pinterest for growing a blog.
However, reinvesting in your blog may be the smartest move you make.
Let me explain.
I’m sure you make some kind of money from your blog, right?
It might be via courses, books, physical products, or services.
Some of these profits should be put back into the business to make it grow faster.
And one way you can do so is via Pinterest Ads.
Most platforms these days offer native advertising which allows you to promote your content, reach a larger audience, and ultimately drive more traffic.
You can begin creating your first Pinterest ad by clicking “Ads” on the top left corner of the website and selecting “Create ad.”
This will take you to ad manager page where you can select a pin to promote.
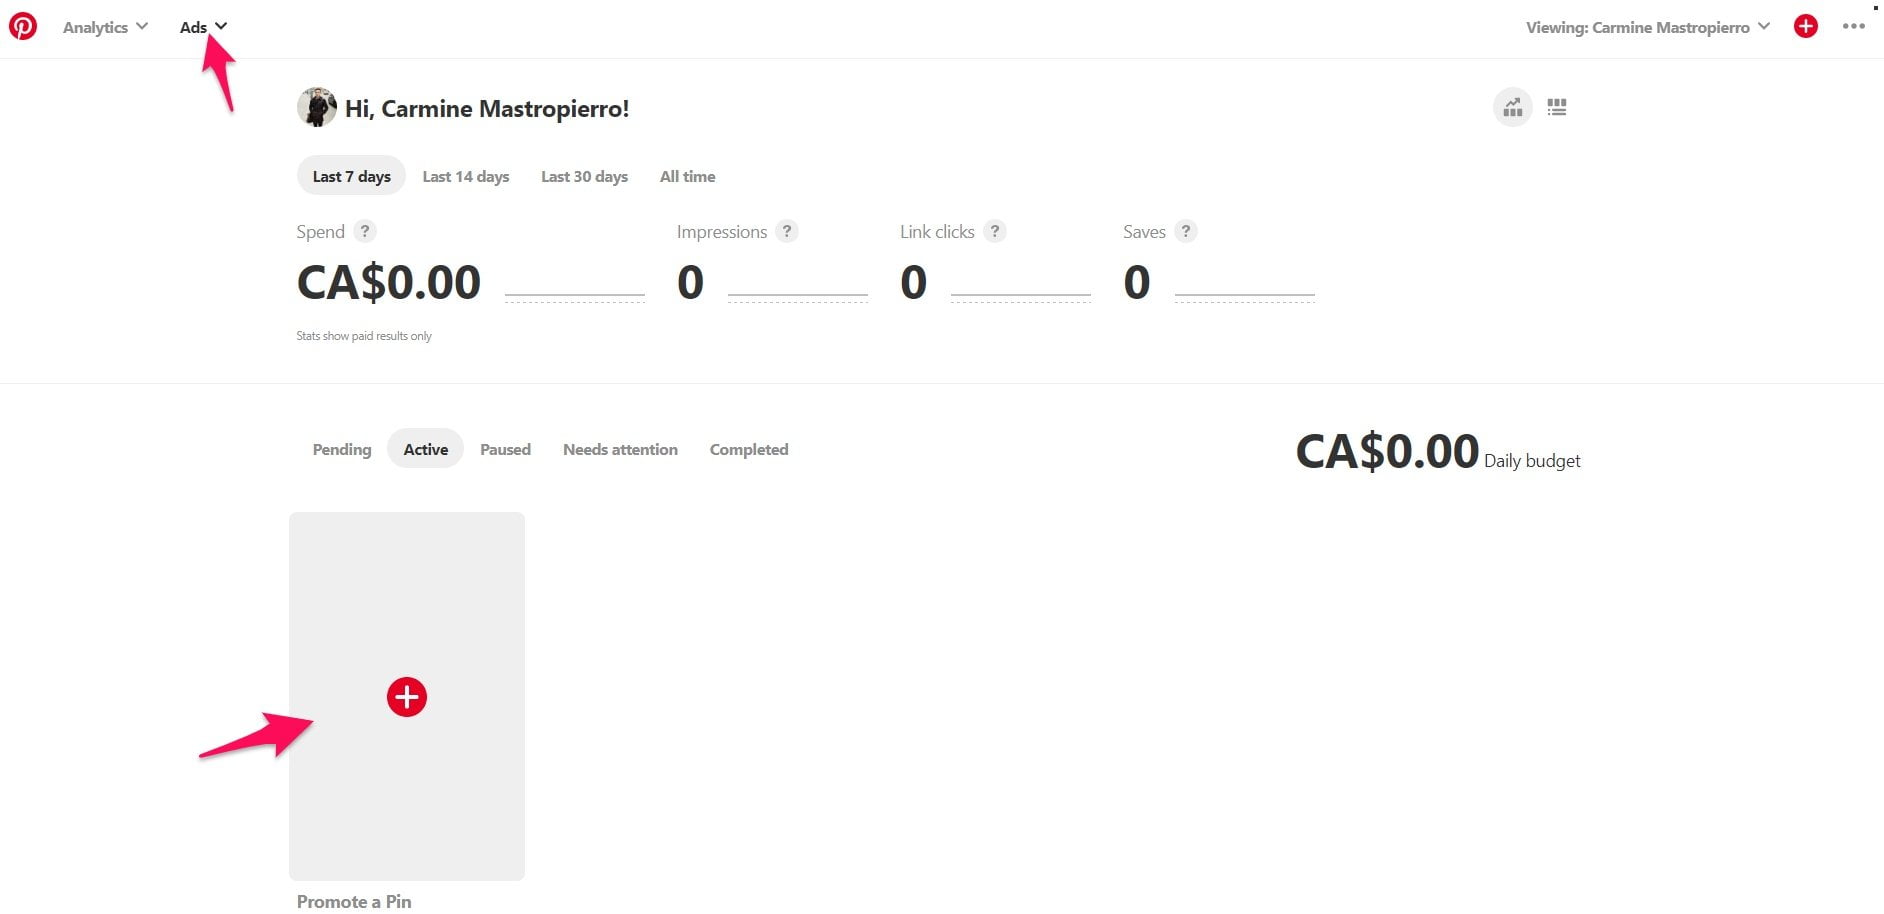
The destination URL will be automatically set to the original, but feel free to change it if you wish.
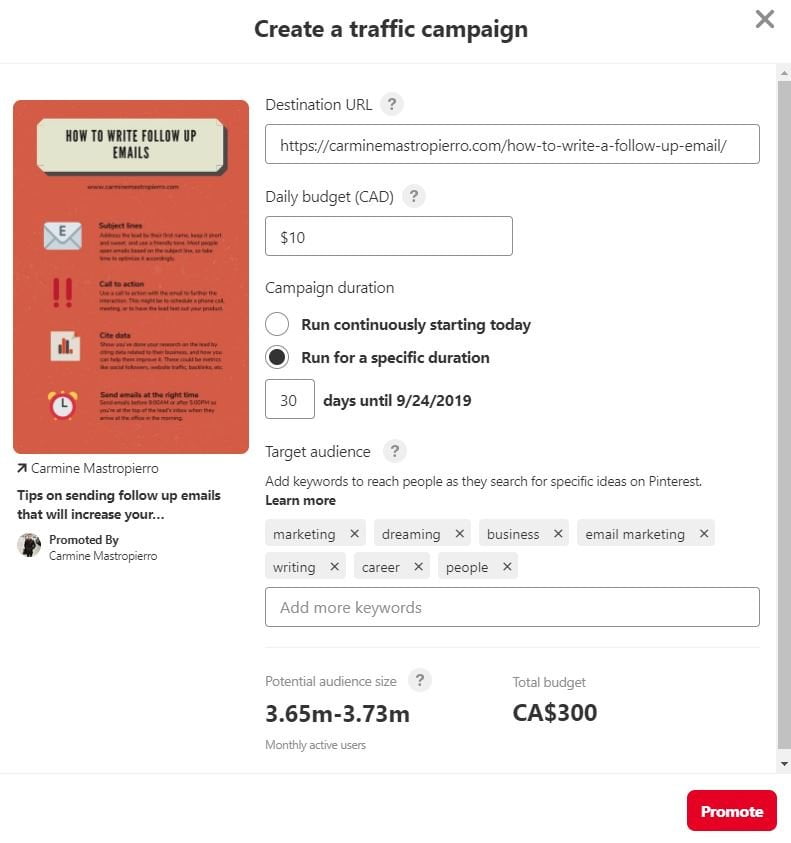
Your daily budget should start small to see what kind of results you generate with your campaign and you can always scale it up over time.
Choose between running it for a specific duration or indefinitely via the check boxes, as well.
A target audience can be set via keywords and Pinterest will estimate how many people you will reach for how much.
Look at the above image. I could be reaching nearly four million people for $300! That’s insane.
Click the red “Promote” button once you’re happy with your campaign and enjoy all of the new traffic 🙂
Final thoughts on growing a blog with Pinterest
Blogs are amazing for earning a living or generating leads, depending on why you’ve launched one.
Either way, Pinterest is a priceless tool for bloggers to scale their traffic and fan base.
Apply the following main takeaways from today’s article and the platform will be a traffic generating powerhouse.
- Create a Pinterest account for free from Pinterest.com. Upload a high quality profile picture, link to your blog, and write an interesting account description.
- Create boards based on the topics you cover on your blog so you can pin individual graphics to each one.
- Use a free tool like Piktochart for creating images. Try to sum up your articles in an entertaining and practical manner.
- Consider investing in Pinterest ads to scale the traffic you drive from the network.
Contact me if you require content writing services to help improve your blogging campaigns.


